Diced! Dessert Challenge Finals!
The Diced! Dessert Challenge is coming to an end with the finals.
Each participant won several rounds. For this round, I am allowing the participant to choose any dessert category.
The posts will run Wednesday, Thursday and Friday. The poll will run from Friday to the following Friday. To date the winner will receive:
- Dodo Book for Cooks
- A beautiful Bamboo Cutting Board with a Butterfly Motif, graciously donated by competitor Lindy (The Kozy Nook)
This finals highlight:
- Luis from The Chef Cat (Wednesday)
- Stephanie from The Haute Meal (Thursday)
- Jenee from JCooksGlutenFree (Friday)
Here’s Jenee…
First of all, thanks to everyone here SO much for getting me to the final round, this has been an AWESOME experience. I’ve “met” some really cool bloggers, and I’ve gotten to create things in the kitchen that I probably never would have before. It’s given me so much to look forward to, during some really stressful times, which brings me to my second point:
The boy and I just moved from Boston to San Jose, CA, with our two kitties in tow. “Just moved” as in had I been writing this post two days ago, it would have been from the floor. And there would have been no finished product because there wasn’t anything in my kitchen. Well, there still isn’t much, but at least now I have a mixing bowl, a sheet pan, some mini spring form pans and measuring cups. Thanks to Target and Marshall’s. And my dwindling bank account.
But I did it! No thanks to the moving truck that’s FOUR DAYS LATE.
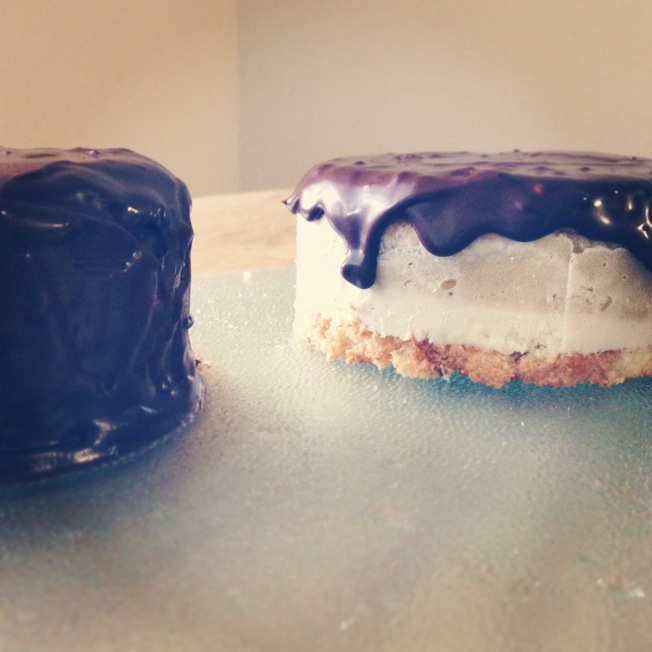
Anywho, I spent a long time thinking about what I wanted to make (had plenty of time for that in Nebraska), what I could make with minimal ingredients and tools. But most importantly I wanted it to mean something. Leaving Boston was a really sad day for me; I’m going to miss a lot of people. Naturally, the first thing I thought of was Boston Crème Pie. But this is a competition, so it needed something more. Our first day in San Jose was a pretty hot one, a good day for something frozen. Like ice cream. Ice cream cake. Or…Boston Ice Cream Pie. Win. (Well, hopefully.)
By now I’m sure you’ve noticed from my recipes that I have a few food restrictions, gluten and lactose. Lactose intolerant I’ve always been, gluten has been a more recent discovery. I found this amazing sponge cake recipe a while back, on a Manischewitz can of potato starch, and I’ve been using it ever since. It’s both gluten and dairy free. And since I can’t drink milk, I ended up with a dairy-free custard recipe, too. I decided, what the hell, might as well make the whole thing dairy free with a good dairy-free ice cream like any of the So Delicious pints. With a good dark chocolate that has no milk added and there you have it, a gluten-free dairy-free dessert anyone could enjoy!
Unless you’re allergic to almonds or eggs. That would suck.
Boston Ice Cream Pie
Sponge Cake (from this recipe):
7 eggs (I’ve used both medium and large eggs, can’t tell the difference)
1 ½ tablespoons of lemon juice
1 ½ cups of sugar
¾ cup of potato starch
Dash of salt
Dairy-free Vanilla Custard (from this recipe):
5 eggs
2 cups of almond milk (or soy or rice)
1 ½ teaspoons of good vanilla extract
½ cup of sugar (or sugar substitute)
Chocolate Ganache:
½ cup of almond milk
9-10 ounces of dark chocolate (dairy free)
Dairy-free Vanilla Ice Cream:
No recipe for ice cream here, I’m not that crazy. Buy some.
Sponge cake:
Preheat oven to 350. Separate six of the eggs into two separate bowls, and beat the yolks with the last whole egg until frothy. Gradually add the sugar and lemon juice, beating constantly until incorporated. Then gradually add the potato starch, stirring gently to blend and then beating for a minute or two to fully combine all ingredients.
In another bowl, beat the egg whites with the salt until stiff but not dry.
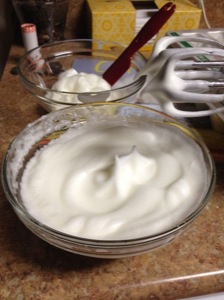
Maybe you’ll even have more than one mixing bowl to do this, so you don’t have to split your egg whites in half and fit them into two cereal bowls.
Fold gently into egg-yolk mixture.

Maybe you’ll have a spatula to do this with, and not just the leveling tool that came with the cheap plastic measuring cups.
Pour the batter into ungreased 10-inch tube pan (this is one time where I think this particular pan is best, I wouldn’t recommend using another type of bundt pan, but you can if you have to). Bake on a lower rack for 45-55 minutes or until cake springs back when touched gently with fingers. Invert the pan and cool thoroughly before removing the cake. (If you’re having trouble getting it out, dip the pan in cold water to loosen the cake. A wet dish cloth works too, but this cake pan is deep so dipping into a bowl or sink of water works better.)

Custard:
Preheat oven to 350. In a large sauce pan over medium heat, combine the almond milk and sugar and bring to a simmer – remove from the heat immediately, you don’t want it to boil. Whisk the eggs and extract in a small bowl until very well blended, and pour just a small amount of the hot milk into the egg bowl at a time – you want to bring the temperature of the eggs up slowly so they don’t cook. Pour all of the hot milk into the eggs, continuing to whisk quickly. Set your pan, ramekins or mini spring form pans (what I went with) into a large sheet pan filled with about 2 inches of hot water. Pour the custard into your pans or ramekins (I think typically you would strain them, but I had no strainer). Bake in the oven for 35-40 minutes or until the tops barely jiggle when shaken (they should have a brownish top layer). Cool until slightly warm, and then refrigerate.
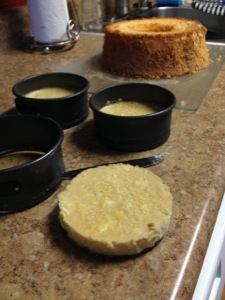
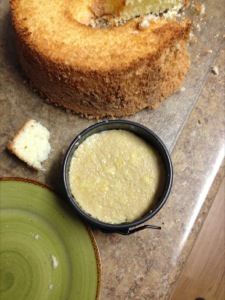
(They’re not very pretty things…) Remove from the pans and place on a plate when ready to assemble.
Ganache:
(Prepare the ganache once your completed cake(s) are ready to be chocolate-d.) Microwave the almond milk in a small bowl for about a minute and a half (just before boiling), remove and stir in chocolate until melted.
Assembly:
This sponge cake is not only easy to make, it’s incredibly versatile and holds up really well. I cut it into slices and pressed the cake into the bottom of a spring form pan (I had 3 mini ones, because that’s what was on sale at Target, but you could use a regular 9” pan, or anything else for that matter).

Then invert the custard layer on top.
Add a layer of softened ice cream, then refreeze so that you can press on a final layer of cake.
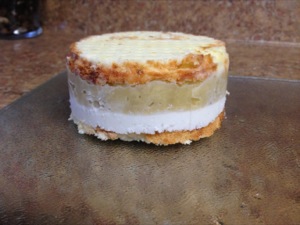
If you used a spring form pan this should be quite easy to remove, I was actually surprised at how it just popped right out to be honest with you.
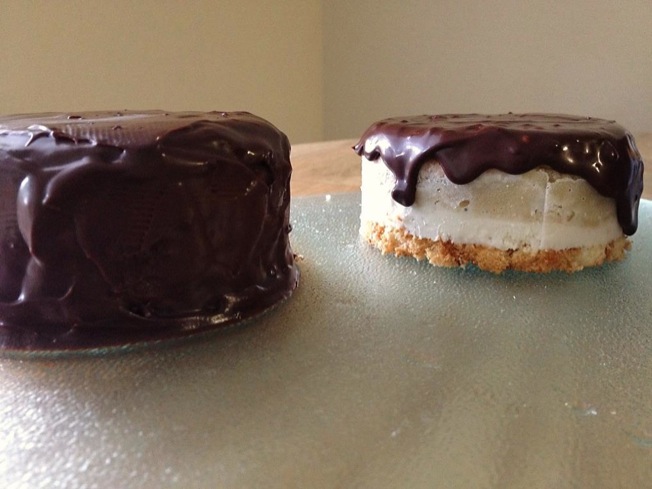
Finally, smother with chocolate ganache.
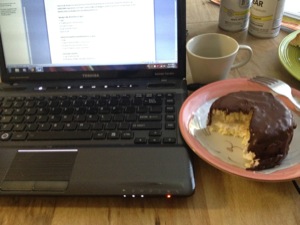
Eat for breakfast while typing your post.
Then go make a shady craigslist deal for a cheap bed frame so you don’t have to sleep on the floor anymore.
Congratulations to my competitors for making it to the finals, and I wish you both the best of luck.
Take care,

Jenee


awww.. looks good 🙂
LikeLike
Thank you!
LikeLike
Reblogged this on jcooksglutenfree and commented:
I made it to the finals of the Diced! Dessert Bracket Competition! Would love for you to take a moment and vote for my gluten-free dairy-free dessert if you can. As the only gluten-free baker in the competition, a win would really mean a lot to me, so I really appreciate your support!
LikeLike
Sounds delicious!!! I need to try it! I voted for you. Miss ya!
LikeLike